

Updating your online inventories after receiving newly repurchased items is critical, to avoid any interruptions in sales.
In OneCart, there are 2 options for updating online inventories:
Option 1: Bulk-upload updated quantities to the OneCart inventory
A quantity bulk-upload replaces OneCart quantities with the newly uploaded data.
1. Navigate to View Inventory > View/Edit Single SKUs: https://app.getonecart.com/variants
2. Click on 'Download CSV' to download your OneCart inventory list
3. Edit the downloaded list, specifically the 'Quantity on hand' column by adjusting quantities based on newly arrived stock - this will involve adding your existing stock and your newly arrived stock.
4. Save the file
5. Navigate to Add Inventory > Bulk Upload: https://app.getonecart.com/bulk_importings
6. Click on 'New Bulk Upload' and follow our guided steps to complete the upload.
Once completed, the OneCart quantities will be updated with the updated data from the CSV list, and pushed out to the connected online listings.
You can find a short video tutorial demonstrating the OneCart Quantity Bulk-Upload module, below:
https://www.loom.com/share/9cae47324f5d48eea9489b719e976b87
Options 2: Bulk-upload Inbound Stock quantities
An Inbound Stock bulk-upload adds uploaded quantities to the existing OneCart quantities on hand.
1. Navigate to View Inventory > Inbound Stocks: https://app.getonecart.com/inbound_stocks
2. Click on 'New Inbound Stock' > 'Download sample'
The downloaded sample is a 2-column file, where Column A is labelled 'Variant SKU' and Column B is labelled 'Quantity on Hand', as shown below
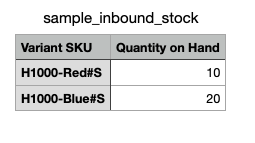
Variant SKU : refers to the OneCart single SKU
Quantity on Hand : refers to the number of newly arrived items for the Variant SKU
4. Fill in Column A and Column B according to your inbound stock and save the file as .csv format.
5. Click on 'Choose File' and upload the .csv file, make sure to name the upload event under 'Name' and click on 'Save'.
If your upload was successful, you should see the following message appear on your screen:
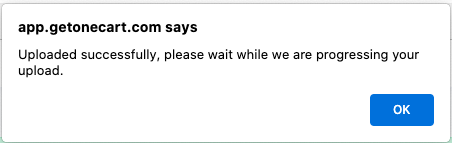
Click OK.
6. By default, your upload status is listed as 'pending', as shown below.

7. To confirm the Inbound Stock upload, click on 'View' > 'Confirm Inbound Stock' as shown below.

8. Once confirmed, OneCart will auto-adjust the OneCart quantities by adding the existing quantity on hand to the quantity on hand specified in the Inbound stock file (i.e., Column B). The newly calculated quantities will then be pushed to the connected listings (provided all SKUs are toggled to ON).
The benefit of Option 2: Inbound Stock is that you or your staff do not need to calculate newly adjusted quantities offline, rather the OneCart system will make that calculation for you in real-time, and auto-push adjusted quantities to your connected listings.
You can find a short video tutorial demonstrating the OneCart Inbound Stock Bulk-Upload module, below:
